Minecraft Story Mode: Chapter 5 Episode 4 A Block and a Hard Place
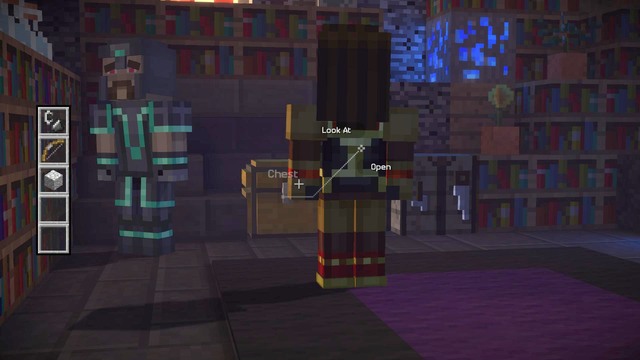
Get to the Ivor's fortress and find the book needed for fighting Wither Storm. As soon as you will regain the control over your character, go to the next room (the one with Reuben) and look around it. To the left, by the Gabriel/Petra you shall find a chest. Take its contents and create a stick and a lever. Place it in the hole next to Reuben.
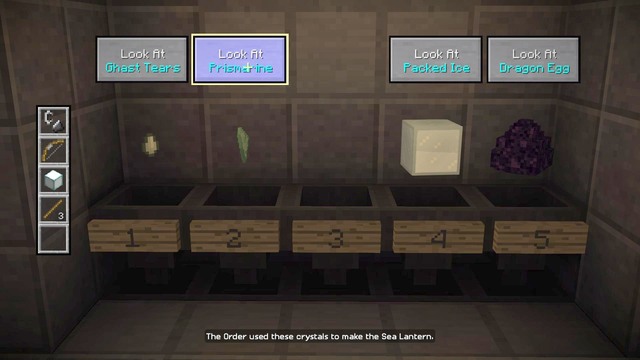
Go to the lower levels of laboratory and collect all of the items from the columns. There should be five of them and Soren will comment about each of them. His comments are important as they are the only clues to the puzzle. Your goal will be placing five items on the right places. Here is the right combination:
- Ghast Tears
- Prismarine
- Sea Lantern
- Packed Ice
- Dragon Egg
The order of the Order |
Ivor likes his puzzle |
I listened to your stories |
... |
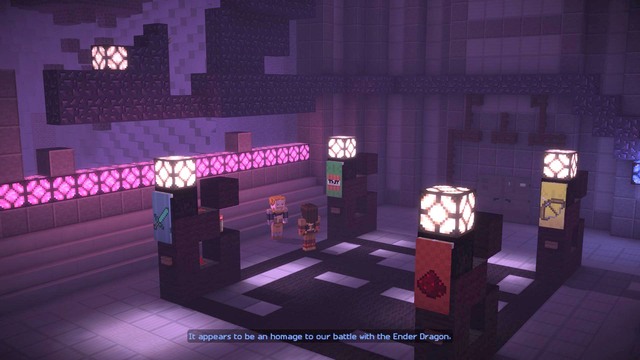
After a short conversation, take a look around. You will be needed to open the doors in the right order. To do so, press the buttons on the pillars. The right combination can be found in the Soren's story. Talk to him to listen to it. The combination for opening the first door can be found below:
- The first button is placed on the bow pillar
- The second button is placed on the TNT pillar
- The third button is placed on the redstone pillar
- The first button is placed on the sword pillar
In order to open the second door, approach the last stone by the bow and Use it. Pull the lever to activate the door.
This isn't possible! |
You said they were destroyed! |
What are they doing here? |
... |
Is the Ender Dragon really dead? |
How did these get here? |
What's going on here? |
... |
What really happened? |
Have you been lying? |
I want the truth! |
... |
Then what DID you do? |
Will you just spit it out! |
This makes no sense! |
... |
I looked up to you! |
How could you lie? |
You're a cheat! |
... |
Is this why you left the Order? |
Why did you do this? |
You knew about this? |
... |
Sorry about punching you |
You're a mad man! |
How is it any better? |
... |
We're wasting time! |
My friend is out there! |
We have to destroy it! |
... |
This better work Ivor |
How do I use the book? |
Let's get on with it |
... |
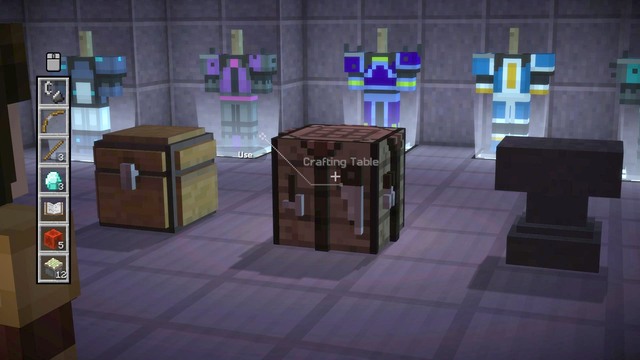
Talk to the group and walk to the chest. Take its contents and use the workbench to create a weapon of your choice. It is also one of the Important Choices, which however, doesn't have an impact on the later events. You can create a hoe, a shovel, an axe or a pickaxe. After creating new diamond weapon walk to the anvil and fill it with a new power. To the left place a recently crafted weapon and to the right put Ivor's book. The next step will be crafting a new armour. You can either keep the one given to you from Magnus/Ellegaard or choose a new one. It is also one of the Important Choices, which however, doesn't have an impact on the later events.
The cavalry has arrived! |
Where's the amulet? |
Where's Magnus/Ellegaard? |
... |
You don't want to know |
They're all fakes! |
I'll explain later |
... |
Fight till the death! |
I made a weapon |
Into the fortress! |
... |
What are you doing? |
You coward! |
Come back! |
... |
- Minecraft: Story Mode: A Telltale Games Series Game Guide & Walkthrough
- Minecraft Story Mode: Game Guide
- Minecraft Story Mode: Episode 4 A Block and a Hard Place
- Minecraft Story Mode: Introduction Episode 4 A Block and a Hard Place
- Minecraft Story Mode: Important choices Episode 4 A Block and a Hard Place
- Minecraft Story Mode: Chapter 1 Episode 4 A Block and a Hard Place
- Minecraft Story Mode: Chapter 2 Episode 4 A Block and a Hard Place
- Minecraft Story Mode: Chapter 3 Episode 4 A Block and a Hard Place
- Minecraft Story Mode: Chapter 4 Episode 4 A Block and a Hard Place
- Minecraft Story Mode: Chapter 5 Episode 4 A Block and a Hard Place
- Minecraft Story Mode: Chapter 6 Episode 4 A Block and a Hard Place
- Minecraft Story Mode: Episode 4 A Block and a Hard Place
- Minecraft Story Mode: Game Guide
You are not permitted to copy any image, text or info from this page. This site is not associated with and/or endorsed by the developers and the publishers. All logos and images are copyrighted by their respective owners.
Copyright © 2000 - 2025 Webedia Polska SA for gamepressure.com, unofficial game guides, walkthroughs, secrets, game tips, maps & strategies for top games.
